Fallout London is a large, user-made mod for Fallout 4. It reimagines London
as a postapocalyptic place with several factions.
The mod is certainly a labour of love, and the area is vast and promises
interesting setups. Not having played Fallout 4 itself, the whole setting is
far too unpaced for my taste.

The scenery certainly looks great in the screenshots, but I could not muster
the patience to grind through the game to see these parts of the city.

A colleague reminded me of this:
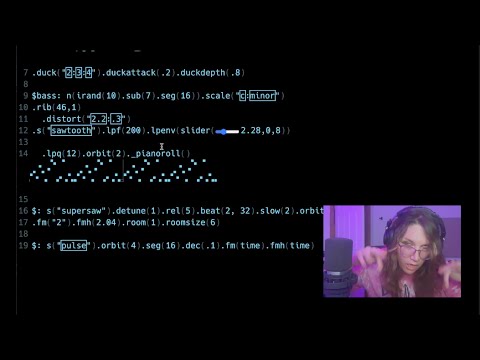
2 Minute Acid with Strudel

Strudel is very much like Supercollider / Sonic Pi, but
as a (Haskel and) Javascript library that can do live editing in the browser.
They also have a
tutorial .
What I like about this are the built-in sliders / visualizers. Connecting
this to MIDI inputs
for live performances could also be fun, if I
was doing live performances or performances at all.
https://www.remedygames.com/games/alan-wake

The game is old, from 2010, and thus isn't as humungous as current games,
and it runs well on current hardware.
The story is OKish, it follows a writer as he discovers he is in his own story,
in a Stephen King / Maine setting. Some darkness takes over people and you have
to fight these.
The gameplay is serviceable as well.
The whole game is made up like a TV series, with distinct chapters and recaps
at the start of each new chapter.
You control Alan Wake from a third-person perspective. The game alternates
between a walking simulator and fights where you have to first burn the
darkness away from creatures and then shoot them with a gun. Often the
creatures come from off-screen behind you, which is not helped by the
close perspective.
[ ]
]
I had played the original Dead Space (2008). The 2023 remake is a take-for-take remake. I felt it was too slow. The combination of slow gameplay and waiting through cutscenes again and again after dieing in combat, combined with the instability (3 crashes within 4 hours of play, on a Windows 10 machine) made me not want to slog through the game again.
The Game setup is always the same. You enter a dark room. Monsters spawn behind you. You kill them by cutting off their limbs. Sometimes you enter a lit room. But then the light goes out and monsters spawn behind you.
There is the occasional jump scare. The fates of the crew are told through text and audio logs. Sometimes there are cutscenes, which are OK, but sometimes there are cutscenes d or long dialogs uring missions, and ypu can't skip them.
I feel that Prey (2017) is more my avenue. It's not dark and there is far more game variety to the gameplay and the enemies.
During a dry spell of games, I found/rediscovered these.
I would name the game genre "slow puzzle side scroller", with dark "story" elements. The story is told purely by the environment, relying on the graphics artists and art direction. No dialogue happens.
The games are fairly short each, so I would not (and did not) buy them at full price. They are on sale for below 10€ , which is a. OK price for each. Little Nightmares III comes out in October 2025, and will start at a price of €30 . I think this is a bit much for expected 20 hours of entertainment.

You move a fellow in a raincoat through parts of a ship, with monstrous sailors and passengers on it. Mostly the gameplay is jump-and-run.

You move another fellow through the country and through a city, and at the end fight a big bad end boss in three rounds. The gameplay is a bit more
varied, with some lightbeam action to stop monsters from attacking you. I recommend playing the game with a controller, since I found it
frustrating in parts with keyboard+mouse.

Size-wise, the game is very small ( 300 MB ), but it is the first game of this kind that caught my eye. It
follows a young person in their travel through a black and white wasteland/city/jump-and-run-scape
with various puzzles and time challenges.
The last level is a jump and run level, while the levels before that are more like a walking game with
some light jump and run parts.
The end (well, the two endings) is a bit unsatisfying as it shows no resolution to the story, but that doesn't detract from the game.

The game is by the same studio as Limbo. You control a young boy on his way from a forest through a city, undersea and
other scenes.
The gameplay is very varied, ranging from simple puzzles over interesting crowd mechanics to even complete changes
in protagonists. The build-up for mechanics is more refined than in Limbo, which to me shows the experience gathered from the previous game.
The end is again without real resolution to the story, but that doesn't detract from the game.


 ]
]


